Shingle Nail Pattern
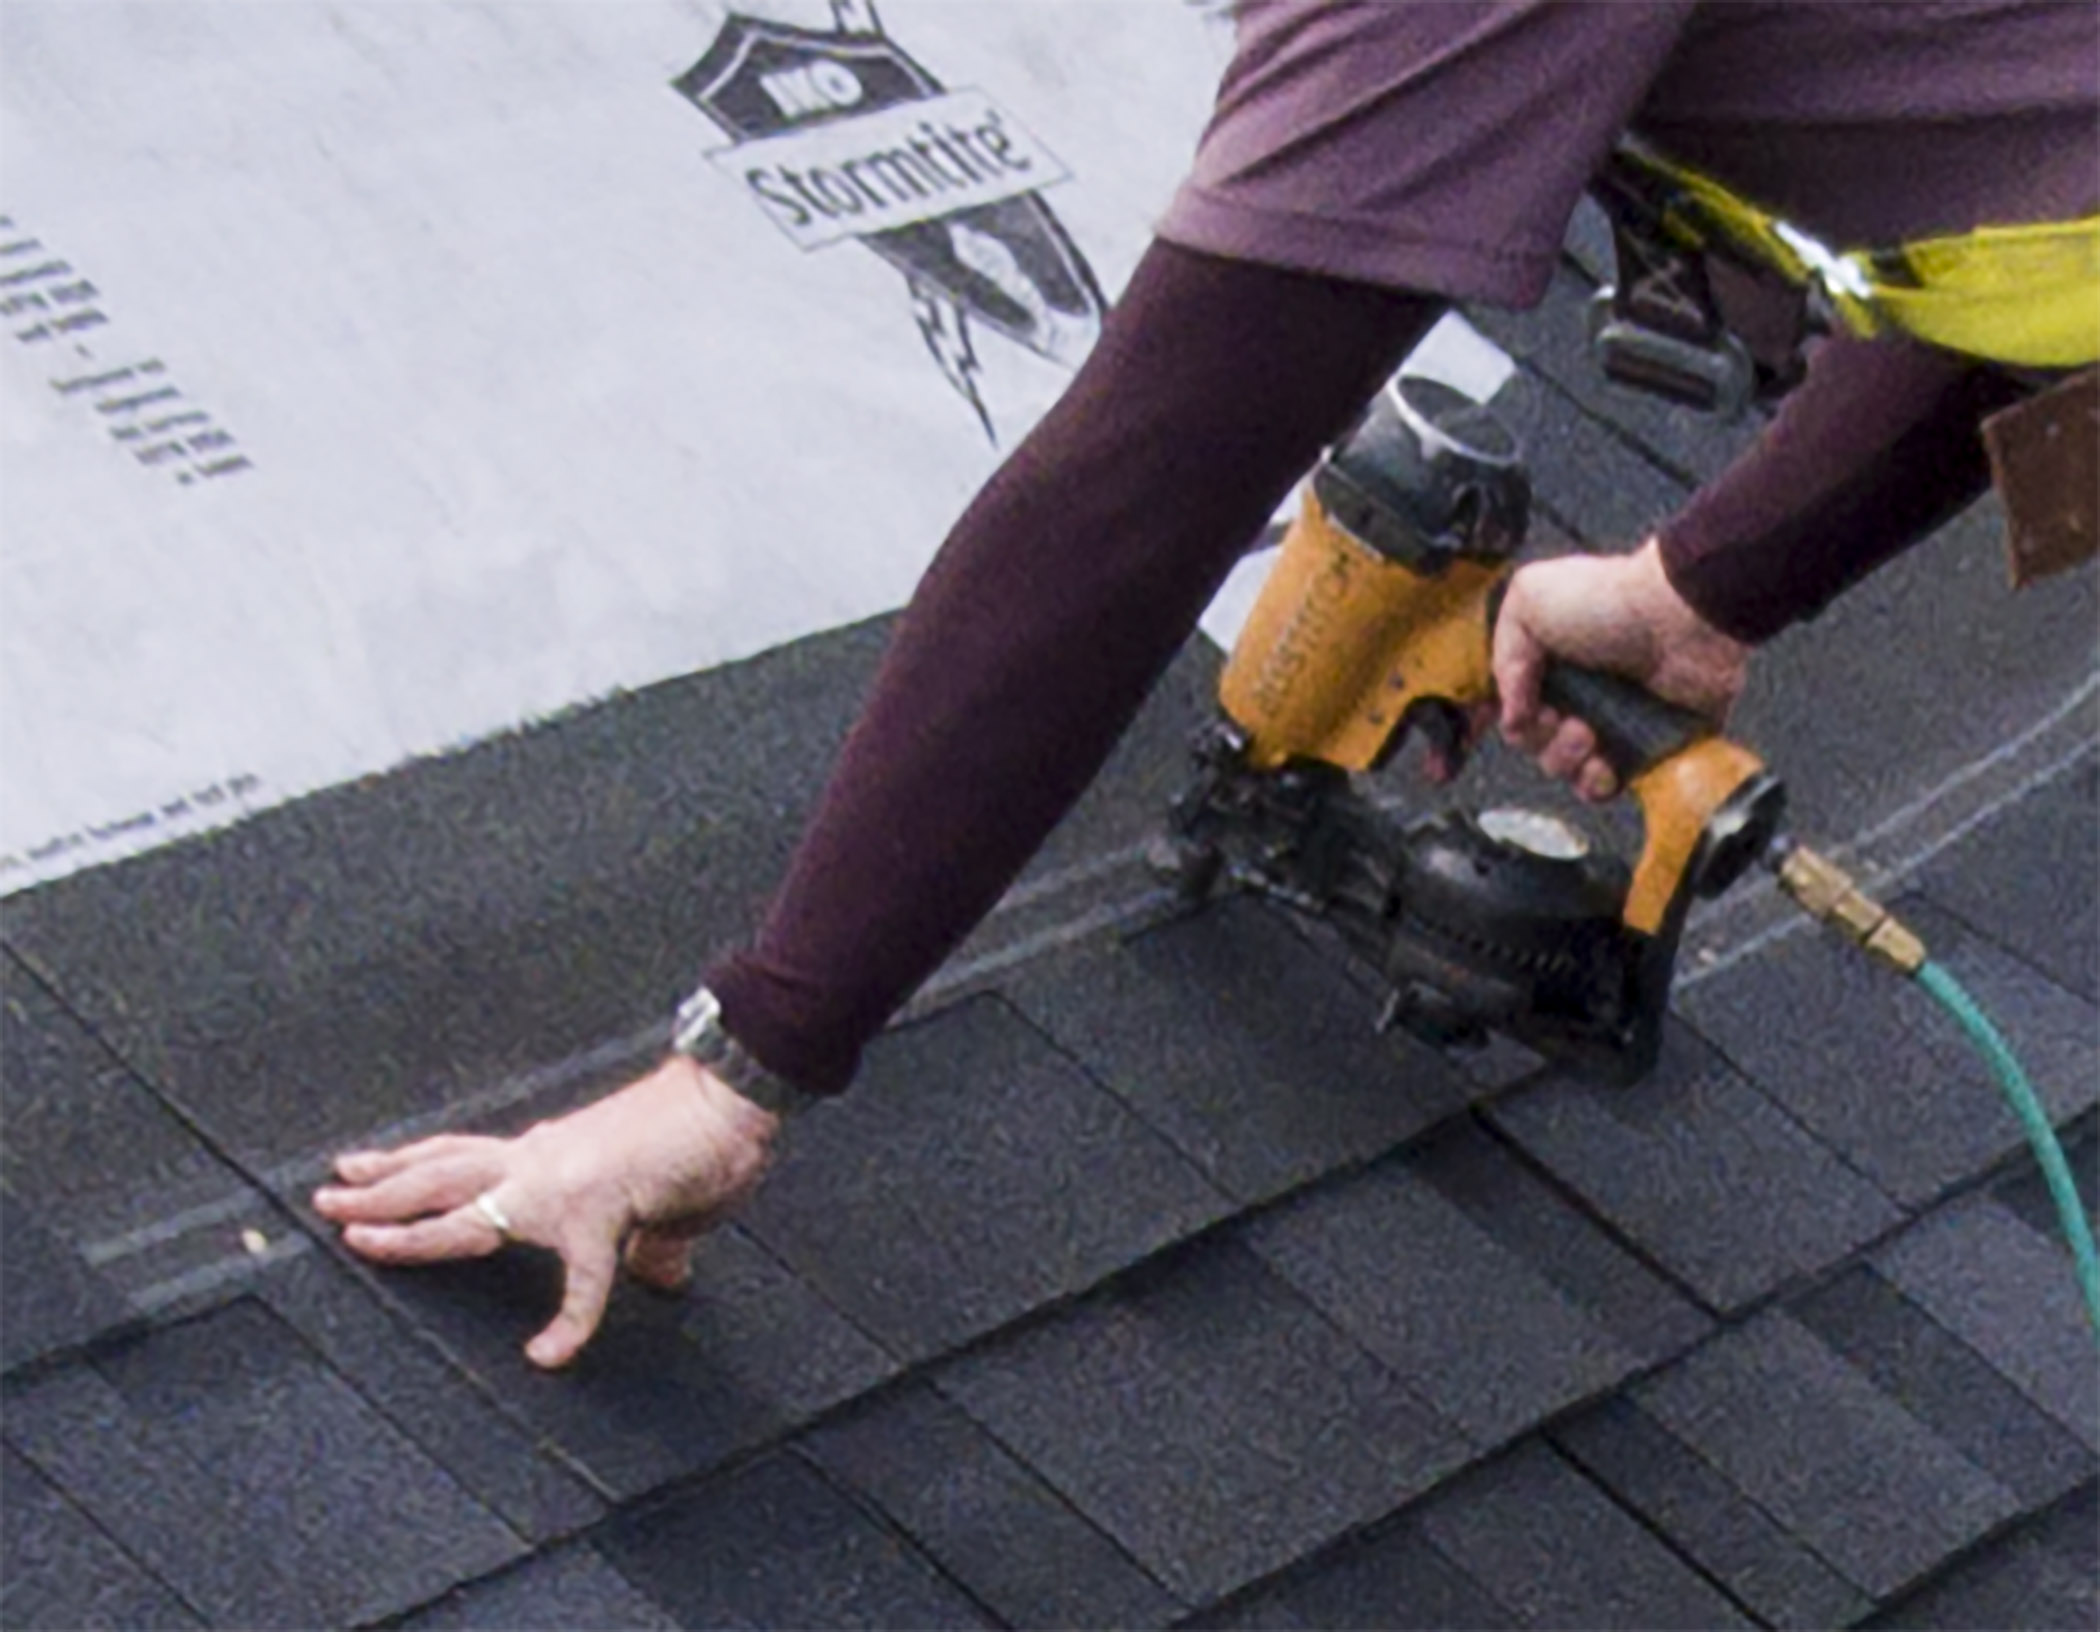
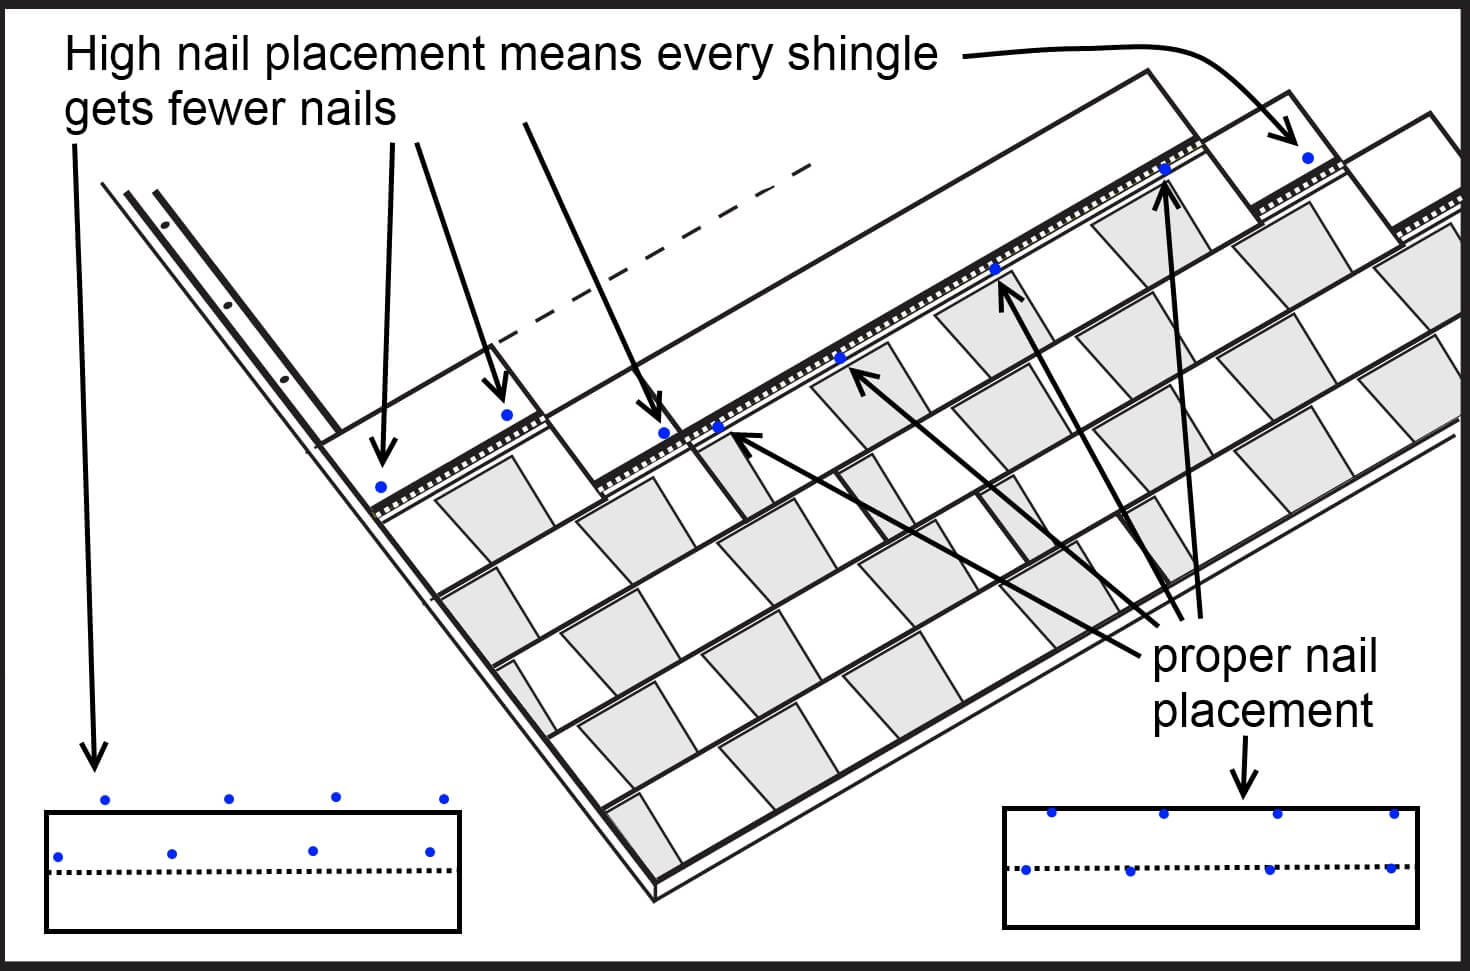
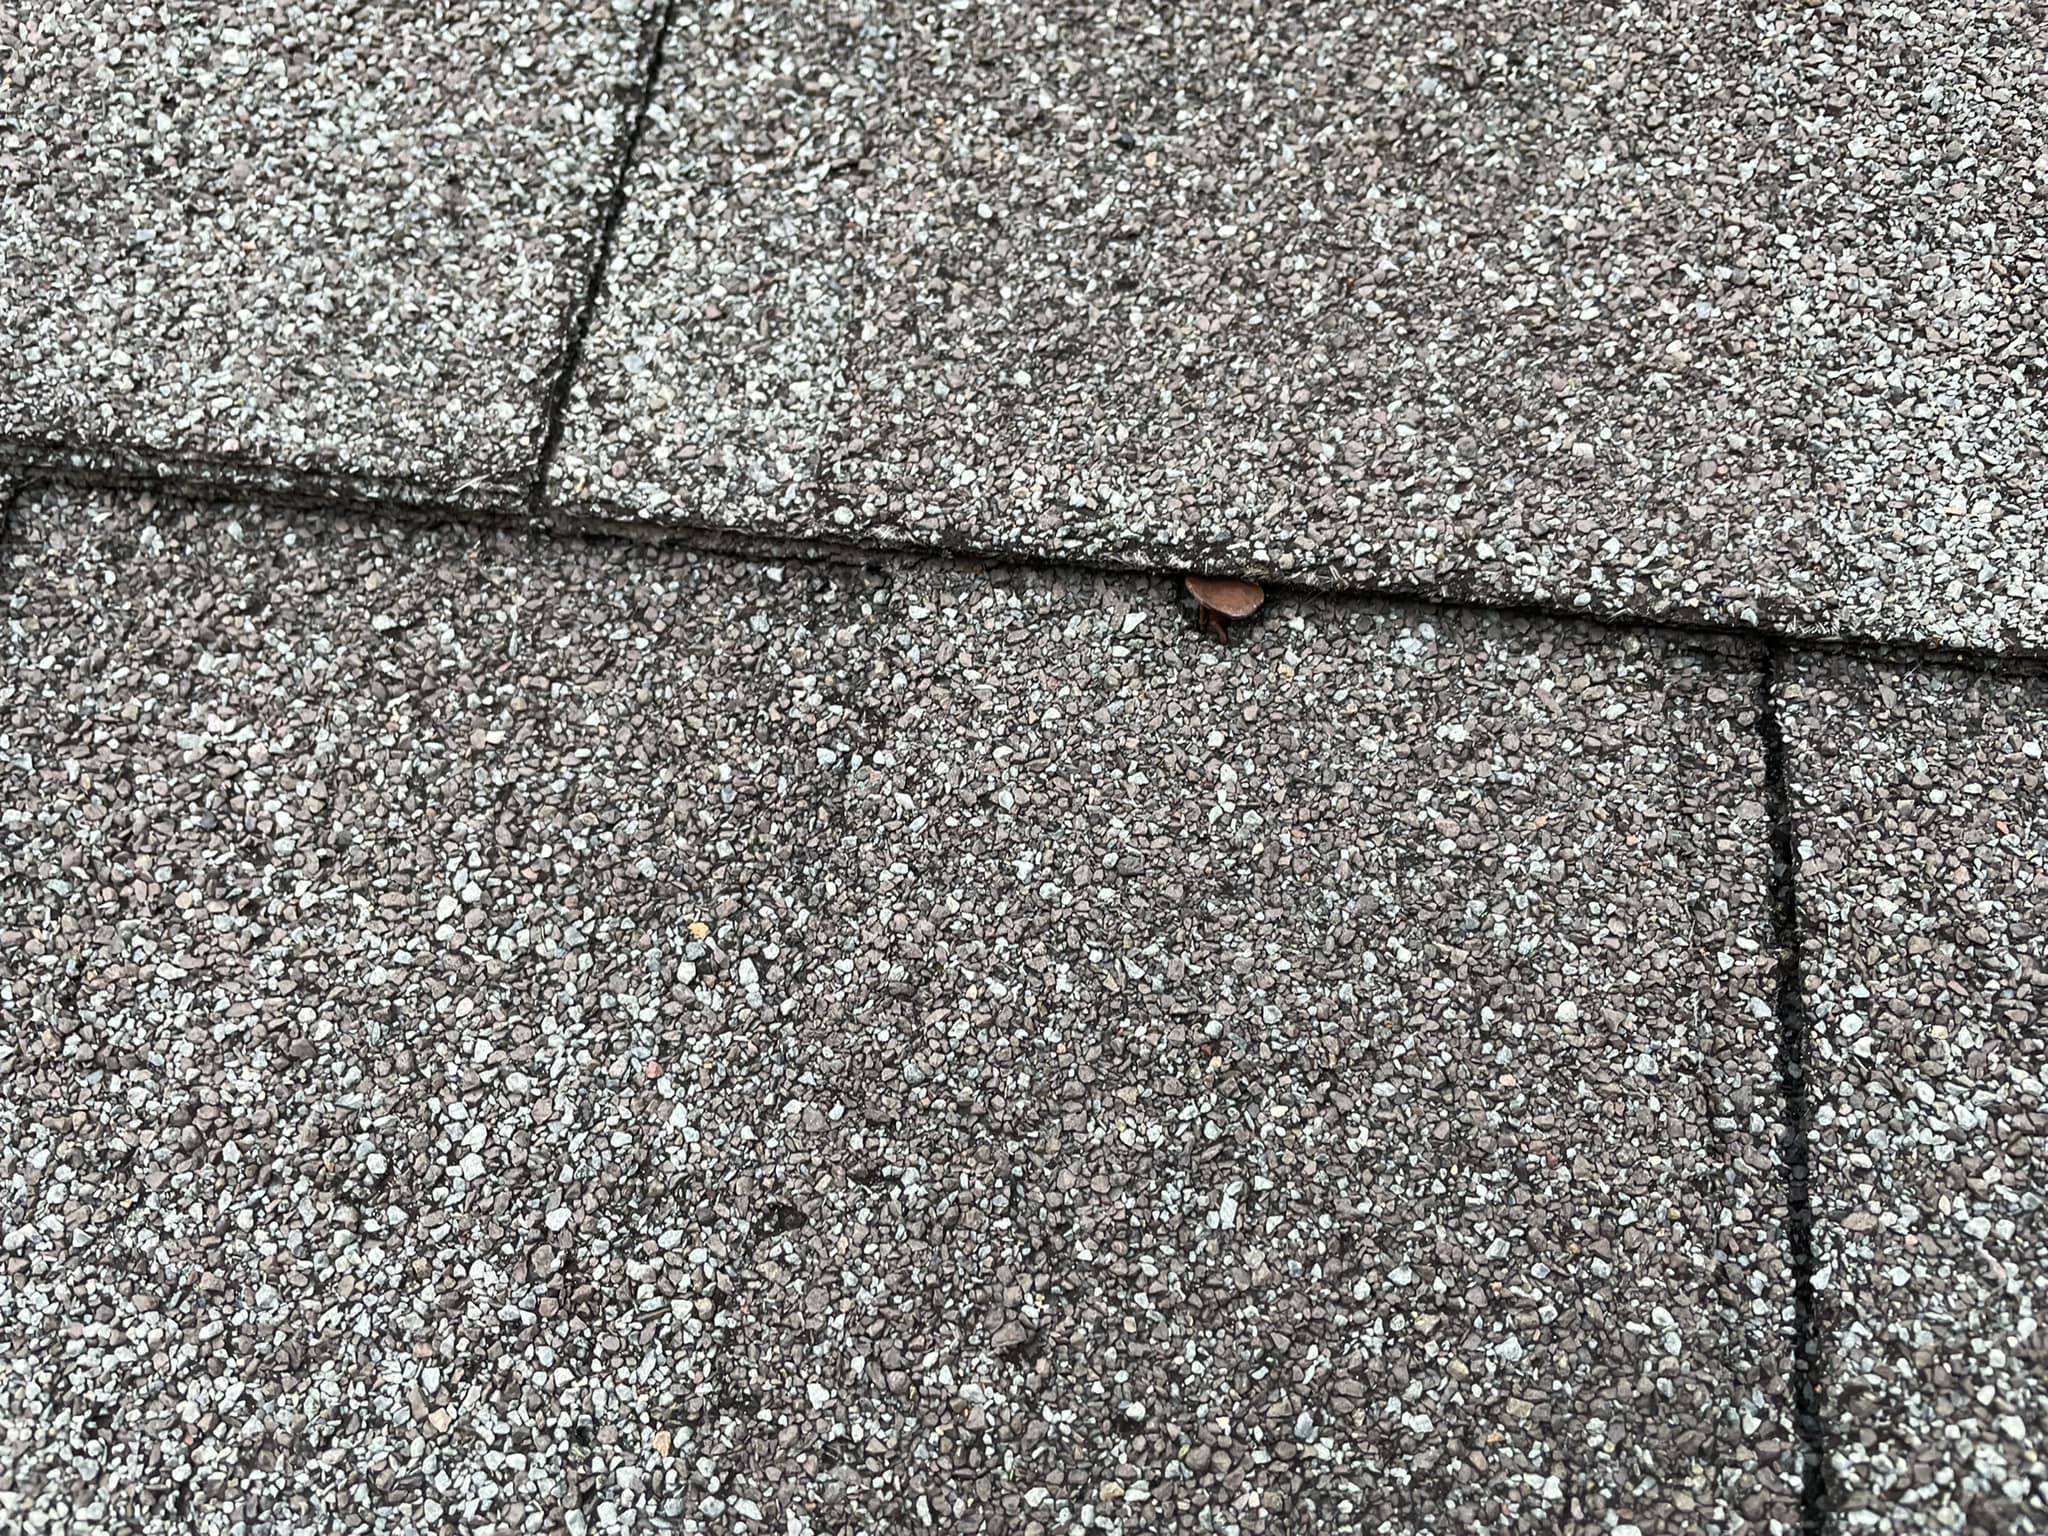
Shingle Nail Pattern - Several of the changes apply to both new construction and roof replacement. Web included below is a copy of iko’s nailing instructions found on each package of iko three tab shingles. How to seal exposed nails. Web so, your next course of shingles should cover the nails by 1 inch vertically. Use a consistent nailing pattern across the roofing material to ensure uniformity and structural integrity. This ensures they stay in place and don’t risk exposure, which can cause corrosion and leaks. Use galvanized (zinc coated) roofing nails, 11 or 12 gauge, with at least 3/8 diameter heads, long enough to penetrate through plywood or 3/4 into boards. This ensures they stay in place and don’t risk being exposed, which can cause corrosion and leaks. Install the right number of roofing nails per shingle (four nails or six nails) to keep it securely fastened on the roof; Many changes strengthen the code to improve the resistance wind and water infiltration damage. Web so, your next course of shingles should cover the nails by 1 inch vertically. Install the recommended number of nails per shingle. Learn about selecting the correct type of shingles, nailing techniques, overlapping and aligning rows, and completing the installation with finesse. In most cases, 4 nails are adequate. Nails should secure two shingles at a time—the top shingle and the edge of the shingle directly below. New arrivalsyou, billionaire !lowest price onlinereply within 24 hours Nail heads should be flush with the top of the shingle. Web roof shingle fastening patterns affect the roof's wind performance and roof leakage. Roofing nails are cleverly designed to help you do a better job. Follow the guideline specified by the manufacturer as each. Position the six nails per shingle according to the layout and installation instructions; The importance of nails in roofing. Install the recommended number of nails per shingle. They are specially designed to secure shingles, underlayment, and flashing to the roof deck. Nails should secure two shingles at a time—the top shingle and the edge of the shingle directly below. As you continue, follow the pattern of lining a full shingle up against the next and then nailing it into place. The importance of nails in roofing. Use a consistent nailing pattern across the roofing material to ensure uniformity and structural integrity. Web nail fastening can happen up to 30% faster when installing gaf shingles with the strikezone nailing area. Position the six nails per shingle according to the layout and installation instructions; Web roofing requirements for shingle roofing systems. Can you reuse roofing nails? This ensures they stay in place and don’t risk being exposed, which can cause corrosion and leaks. Nail heads should be flush with the top of the shingle. Web so, your next course of shingles should cover the nails by 1 inch vertically. How to fix nail pops in a roof. We’ll cover each crucial aspect of the job. As you continue, follow the pattern of lining a full shingle up against the next and then nailing it into place. Web roofing requirements for shingle roofing systems. This ensures they stay in place and don’t risk exposure, which can cause corrosion and leaks. In most cases, 4 nails are adequate. Web when you install the shingles, leave one shingle unnailed so you can later slip a ridgecap under it. Position the six nails per shingle according to the layout and installation instructions; Web what type of nails. Understanding the different types of roofing nails available can help homeowners and contractors select the right nail for their projects. In fact, if a roofer places your nails incorrectly, it can invalidate your warranty from the manufacturer! Install the recommended number of nails per shingle. Position the six nails per shingle according to the layout and installation instructions; Install the. New arrivalsyou, billionaire !lowest price onlinereply within 24 hours Nail heads should be flush with the top of the shingle. We’ll cover each crucial aspect of the job. Place nails at the designated spacing specified by the shingle manufacturer, typically around 6 to 8 inches apart horizontally and 1 to 2 inches from the edges of the shingle. Web most. All three of the nails in this photo are incorrectly installed. Web when you install the shingles, leave one shingle unnailed so you can later slip a ridgecap under it. New arrivalsyou, billionaire !lowest price onlinereply within 24 hours Many changes strengthen the code to improve the resistance wind and water infiltration damage. Install the right number of roofing nails. Web nail fastening can happen up to 30% faster when installing gaf shingles with the strikezone nailing area than when installing traditional timberline hd shingles. Place nails at the designated spacing specified by the shingle manufacturer, typically around 6 to 8 inches apart horizontally and 1 to 2 inches from the edges of the shingle. New arrivalsyou, billionaire !lowest price. Install the recommended number of nails per shingle. Can you reuse roofing nails? Many changes strengthen the code to improve the resistance wind and water infiltration damage. In fact, if a roofer places your nails incorrectly, it can invalidate your warranty from the manufacturer! This slide illustrates several reasons why the roofing professional needs to follow the florida building codes. Correctly line up the shingles to avoid. Shop local offersbrowse our pro directoryfind an experttrue cost guides This chapter will demonstrate how to properly nail roofing shingles. Follow the guideline specified by the manufacturer as each. Many changes strengthen the code to improve the resistance wind and water infiltration damage. Web so, your next course of shingles should cover the nails by 1 inch vertically. Install the recommended number of nails per shingle. Use galvanized (zinc coated) roofing nails, 11 or 12 gauge, with at least 3/8 diameter heads, long enough to penetrate through plywood or 3/4 into boards. Web roofing nails are pivotal in ensuring the durability and integrity of a roofing system. Place nails at the designated spacing specified by the shingle manufacturer, typically around 6 to 8 inches apart horizontally and 1 to 2 inches from the edges of the shingle. Other types of shingles, such as architectural and random cutouts, are installed much the same way. They are specially designed to secure shingles, underlayment, and flashing to the roof deck. Web nail fastening can happen up to 30% faster when installing gaf shingles with the strikezone nailing area than when installing traditional timberline hd shingles. Web included below is a copy of iko’s nailing instructions found on each package of iko three tab shingles. In most cases, 4 nails are adequate. Nails should secure two shingles at a time—the top shingle and the edge of the shingle directly below.
Nailing Pattern For Architectural Shingles Nail Ftempo
A Guide to Roofing Nails for Shingles Nail Sizes & Types IKO

Nailing Pattern For Architectural Shingles Nail Ftempo

Proper Nailing Pattern For Architectural Shingles Nail Ftempo
Improper Shingle Nailing

Roof Shingle LayOut and Nailing Patterns GutterBrush

The standard nailing for asphalt shingles is a fournail pattern, with

Nailing Pattern For Architectural Shingles Nail Ftempo
Shingle Nailing Pattern McToolman

Nailing Pattern For Architectural Shingles Nail Ftempo
Use A Consistent Nailing Pattern Across The Roofing Material To Ensure Uniformity And Structural Integrity.
As You Continue, Follow The Pattern Of Lining A Full Shingle Up Against The Next And Then Nailing It Into Place.
Can You Reuse Roofing Nails?
Web Most Shingles Require Either A 4 Or 6 Nail Pattern Per Shingle To Ensure A Tight Seal.
Related Post: